Steve Cushing Impresionist Fine Art Photography

Embracing imperfection, recording emotions, one impression at a time…

Understanding Aperture


Please read the section on how lenses work first. LINK here to this section.


Please also see the section on
Exposure

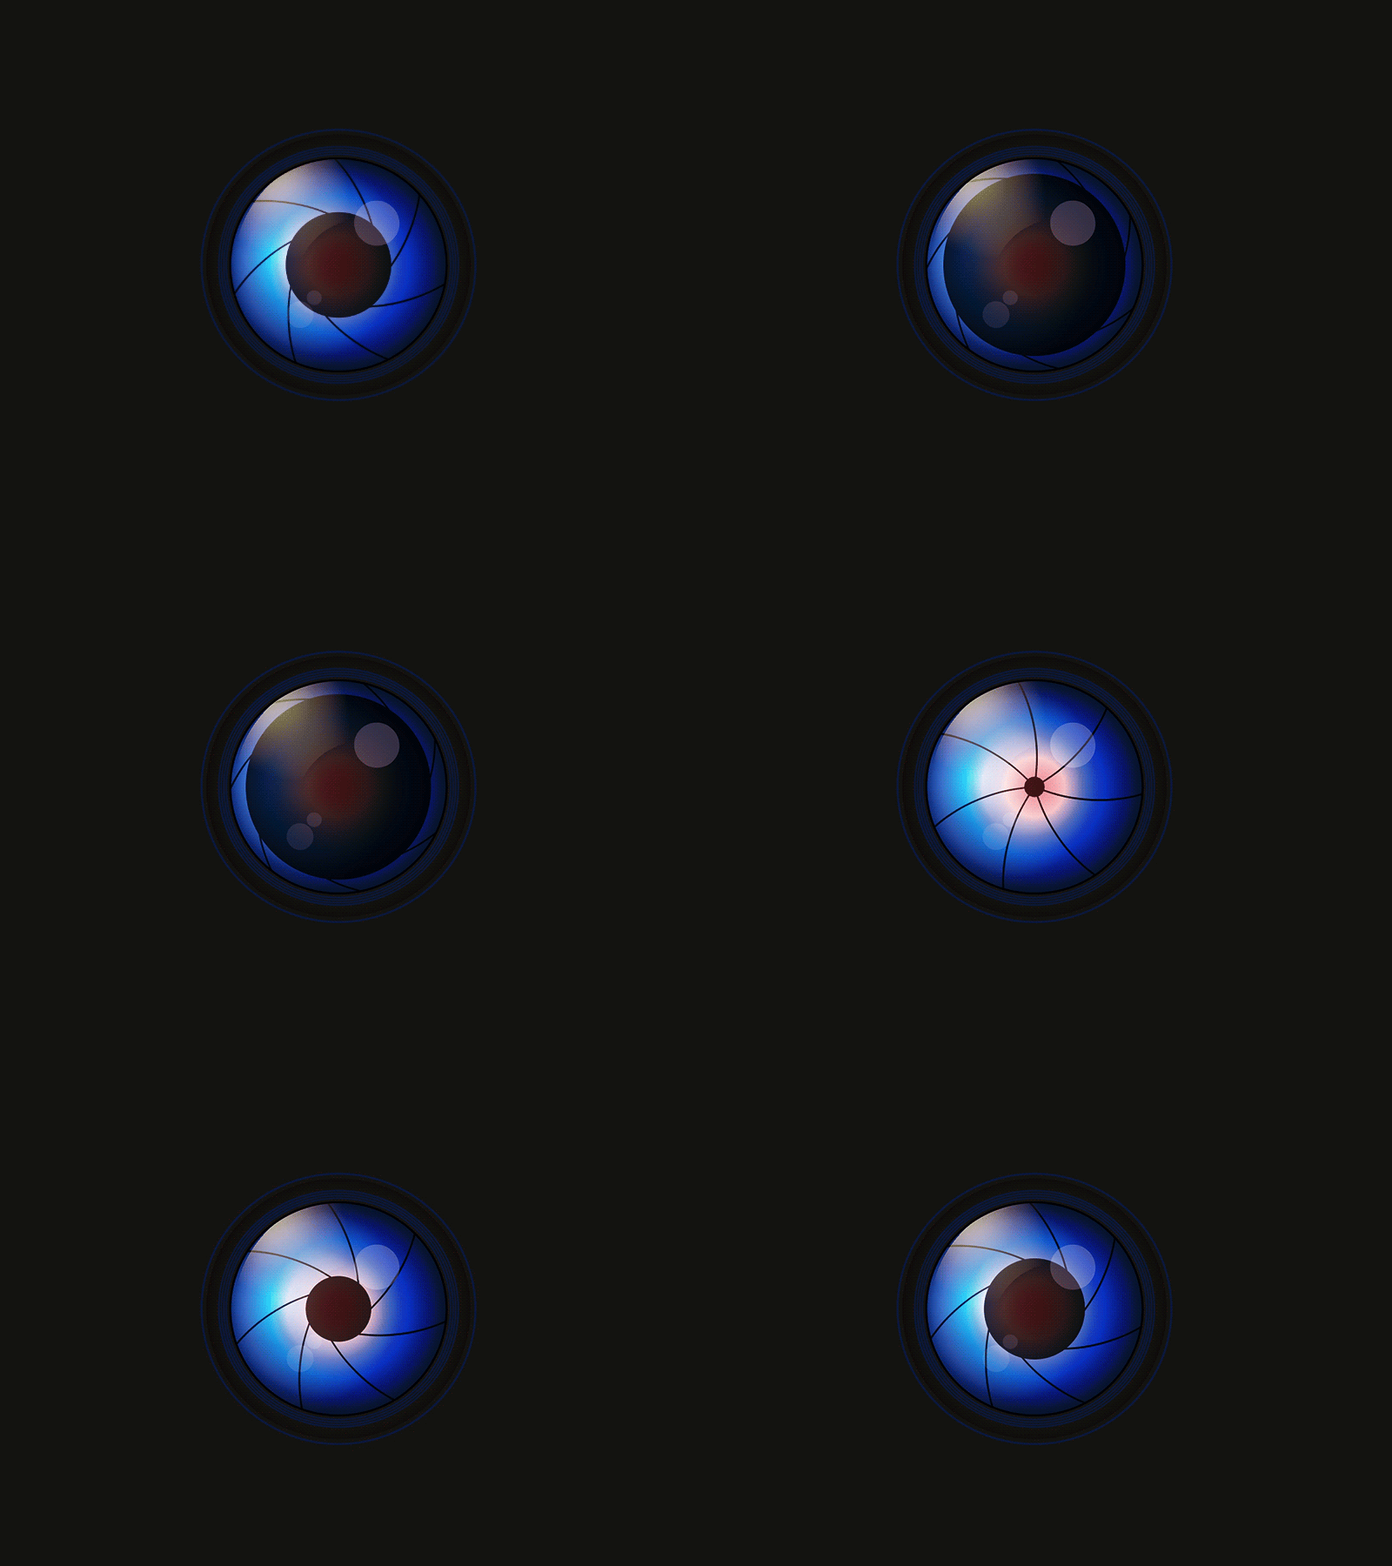
Think about your eye. Your eye is essentially the same as a camera, and the iris in your eye works performs the same function as the aperture in a camera's lens.

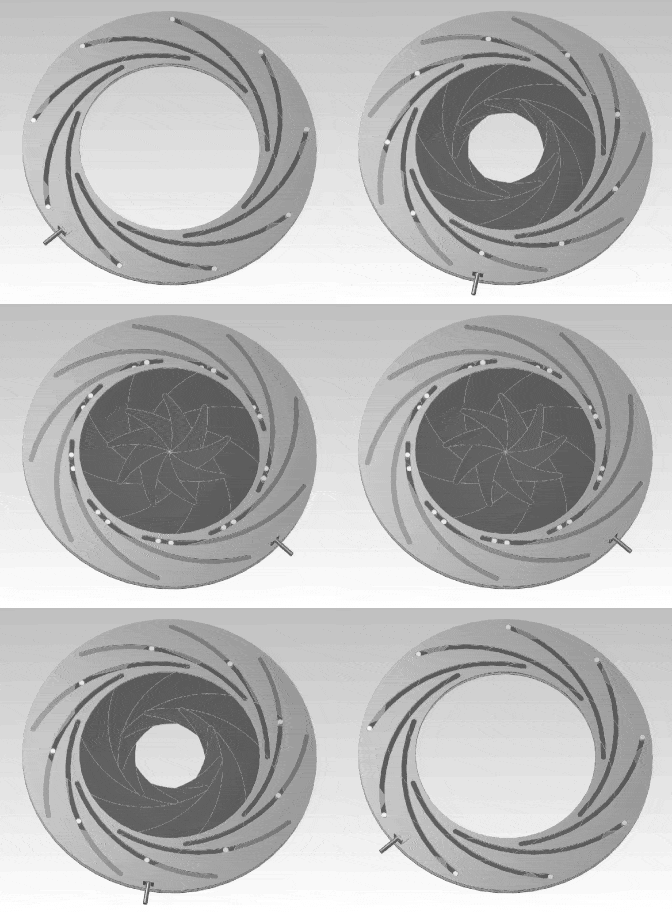
In a camera the aperture is usually made of a series of interlocking metal blades that open and close like an iris although originally it was simply a series of replaceable plates with holes in them.

Both aperture and shutter are the same mechanism—they both open and close when you click the shutter button.
Shutter speed determines how long the aperture remains open. Aperture is how big the opening is that let's light in, expressed in f-stops. So it refers to the access given to light from the lens to the camera sensors.

Stacks Image 26

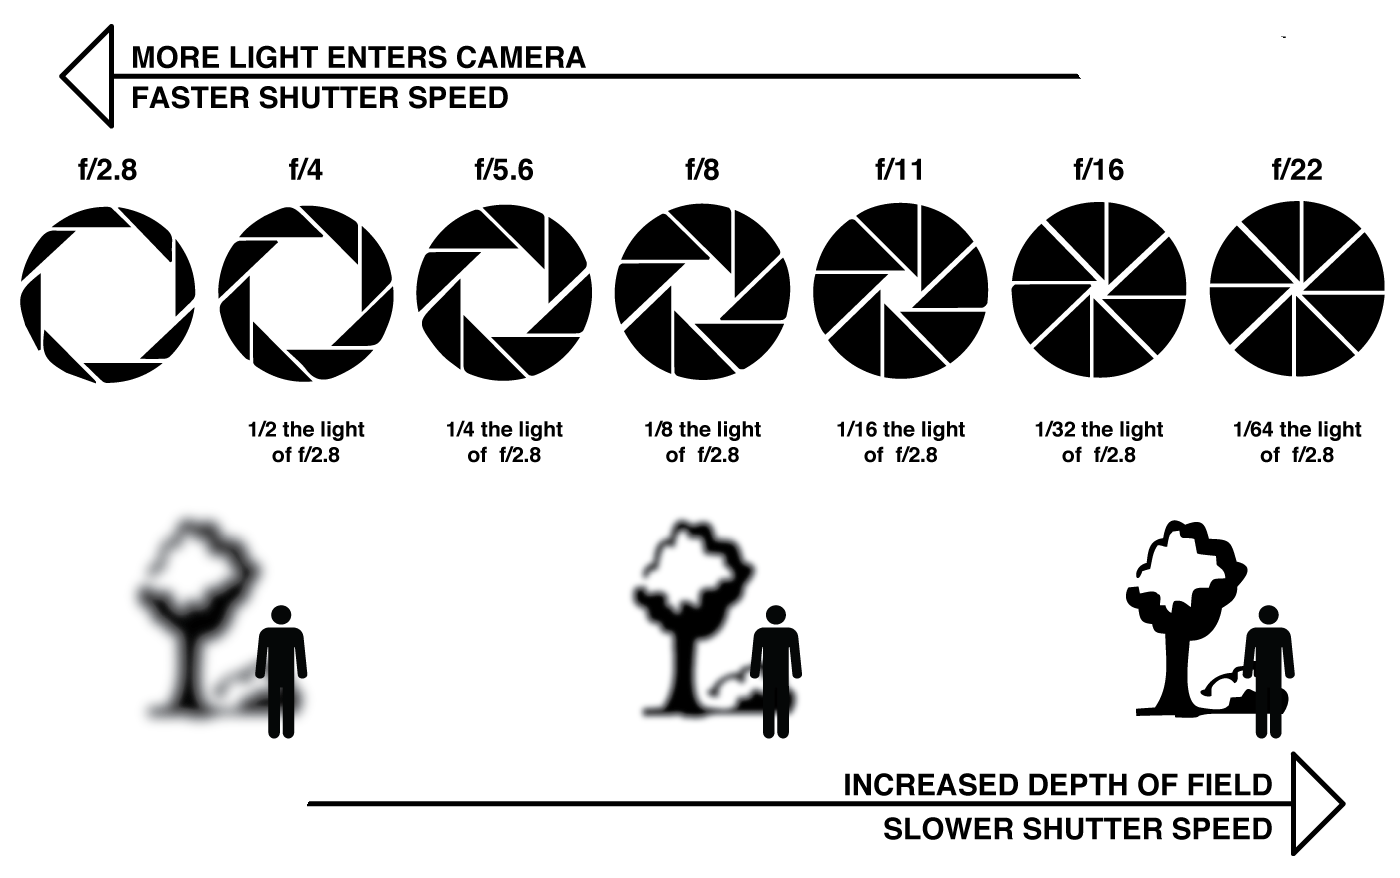
The size of your aperture (the diameter of the hole through which light enters the camera) changes so that it can control the amount of light entering your lens. As stated it is measured in F-stops but these are counterintuitive, because the larger the number, the smaller the opening. Aperture is expressed as a fraction, measured in f-stops.

A low f-stop, or f-number, indicates a wider aperture, while a high f-stop narrower aperture. Just as ½ is a greater quantity than ¼, f/2 is wider than f/4. Both are wider than f/16. For example, f/2.8 allows twice as much light into the camera as f4, and 16 times as much light as f11.

Aperture affects the depth of field: larger openings create a shallower
depth of field, while smaller openings make more of the image in focus. See the explanation for this later in this section.

Apertures consist of a number of aperture blades that open and close sliding over each other. They should not have oil on them as this can stick and cause the blades to be become displaced.

The greater the number of blades the better the bokeh when stopped down but when automatic apertures came in, manufacturers cut down on the number of blades to make it easier to stop the aperture down quickly as the shutter fired as for focusing on through the lens DSLR you needed the aperture fully open to focus correctly. Mirrorless cameras has removed this issue so many modern lenses have a large number of blades again.

Stacks Image 28
Stacks Image 71
Stacks Image 73


Using the aperture (f-stop) of your lens is the simplest way to control your depth of field as you set up your shot. One of the issues many amateur photographers have in creating good images is that they focus upon the subject t be photographed and forget about the rest of the images. By controlling depth of field it is possible to create the whole image by decisions about what is in focus and what is not and what the background is to create bothe a good overall composition and to get what is called subject pop where the item forming the main focal point stands out from the background. When we look at a scene out brains build an image that has infinity focus, this is not always the best option or even a possibility in photography plus as the photographer you need to create the focal of attention.

Personally I always shoot manually so that I can control the aperture and shutter speed and thus consider the whole composition of an image. Automatic settings cannot achieve creative results in the same way as they work on averages not on the actual composition being created.


Stacks Image 11


F-numbers are actually the mathematical relationship between your camera’s
focal length and the size of the hole:

Focal Length / Diameter of Aperture = F-Stop

This means that aperture remains consistent across different cameras and focal lengths—the same f-stop will create the same exposure, no matter your camera’s focal length.

For example, say you have two cameras: one with a focal length of 90mm the other with a focal length of 60mm. An f/4 aperture setting on the 90mm lens creates an opening that is 22.5 mm (a quarter of the focal length), while that same aperture on the 60mm lens results in a 15mm wide opening (which is still a quarter of the focal length). Both cameras will produce the exact same image with the same depth of field and the same exposure, as long as the shutter speed and ISO remain consistent.

Controlling the size of your camera’s aperture manually let you control two things: exposure and depth of field plus increases or decreases sharpness and effects the bokeh.

Maximum Aperture.

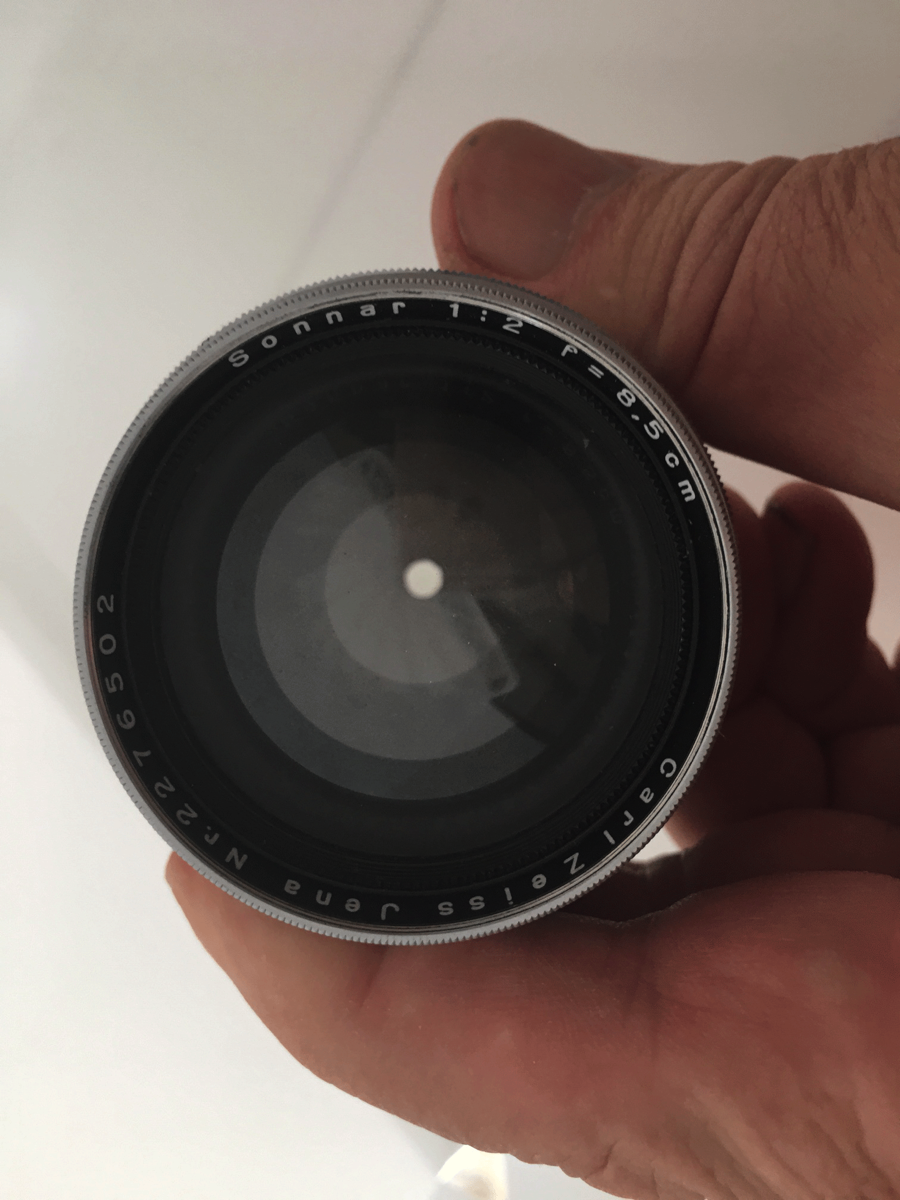
Lenses will state a maximum aperture on the barrel, indicating the maximum width a lens aperture can open. Typically, lenses with a wider maximum aperture cost a more. A lens with a wide maximum aperture is great for low light situations, so if you are considering night photography, it will be worth the investment.

But whatever the lighting conditions apertures are vital for the creative photographer. Controlling the amount of the photo that is in focus is one of the photographer’s best tools to help draw the viewer’s eye where you want it. For example, landscapes are typically shot so that everything is in focus, so photographers will shoot at small apertures (e.g. f11 or f16). The depth of field varies with the type of lens, due to maximum aperture.

Large aperture = Small f-number = Shallow (small)
depth of field
Small aperture = Larger f-number = Deeper (larger)
depth of field

It may be easier to remember this simple concept: The lower your f-number, the smaller your depth of field. Likewise, the higher your f-number, the larger your depth of field. For example, using a setting of f/1.2 will produce a very shallow depth of field while f/11 will produce a deeper DoF.

Why does the aperture not cause vignetting when it gets smaller?

The purpose of any camera lens and aperture is to control the light rays entering the camera. Also see Lens Glass
HERE

The simplest kind of lens would be a pinhole in a piece of thin metal or black paper. With this only an extremely small part of the light reflected by a subject would pass through the very small pinhole. If the pinhole was large, it would allow more light rays to enter but also would blurs the image. This blur is really an overlapping of several image cones entering through the hole. Images produced by large and small pinholes would be the same size, but one is blurred, while the other would be sharp. A lens helps to sort out these multiple image blurs but even a single light source causes a blur if the hole is large.

Think about your eye. Your eye is essentially the same as a camera, and the iris in your eye works performs the same function as the aperture in a camera's lens.

When you walk outside on a bright day, your irises constrict (gets smaller) to reduce the amount of light that hits your retina, but you still have the same field of view and the image isn't cropped or vignetted. The same thing obviously happens with your camera's lens when the iris gets smaller at a higher aperture.

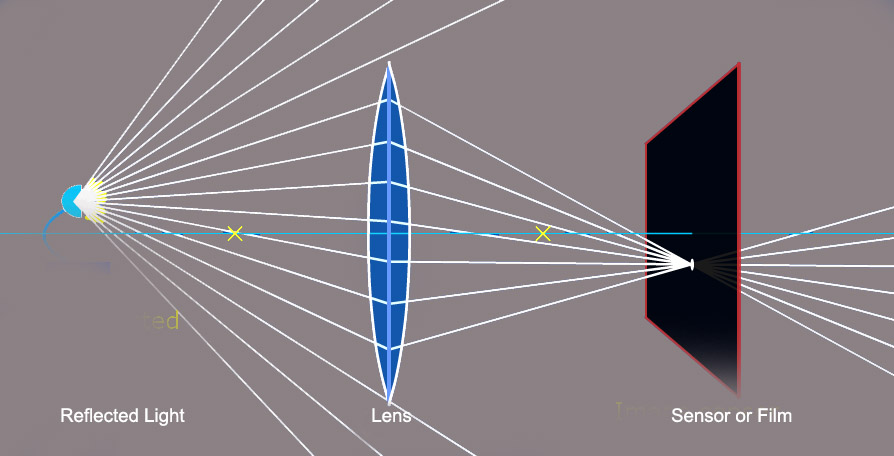
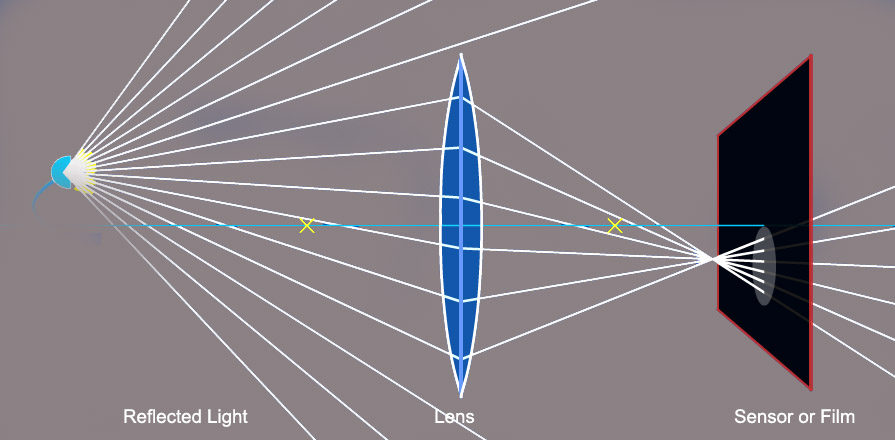
To understand this you need to understand reflected light. The light that reflects off any one single point on a surface isn't one beam of light like a laser beam, but many, coming in at many different angles and reflected off at many different angles like a cone. Most of these beams will never hit the lens on the camera, however, some will, and will be focused onto a single point on the image-sensor (assuming that point is in focus) by your lens.To make things simple we will have to ignore some things. First when asked is lights a wave or a particle a scientist is reported to have answered "yes". This is because it is both. But we will look at it as a straight line for it acts like this for our purposes here. Second we will use a very simple one element lens.

Rays from the entire image fall on the entire surface of our lens (whether the lens is your camera or your eye). You can imagine a cone of rays leaving each point in the field of view, where the tip of the cone is at the point and the base of the cone is the lens.

Stacks Image 34


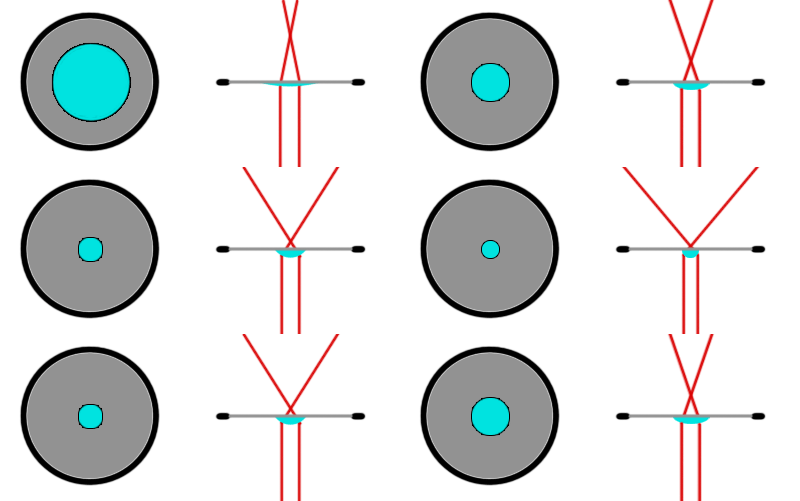
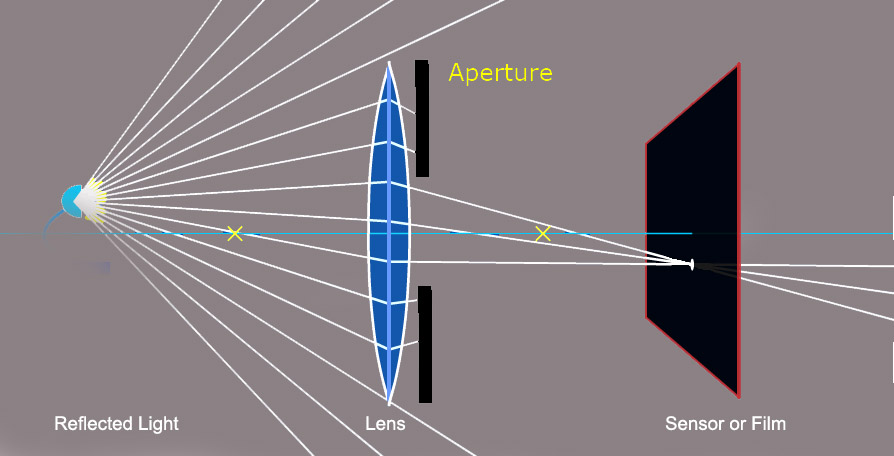
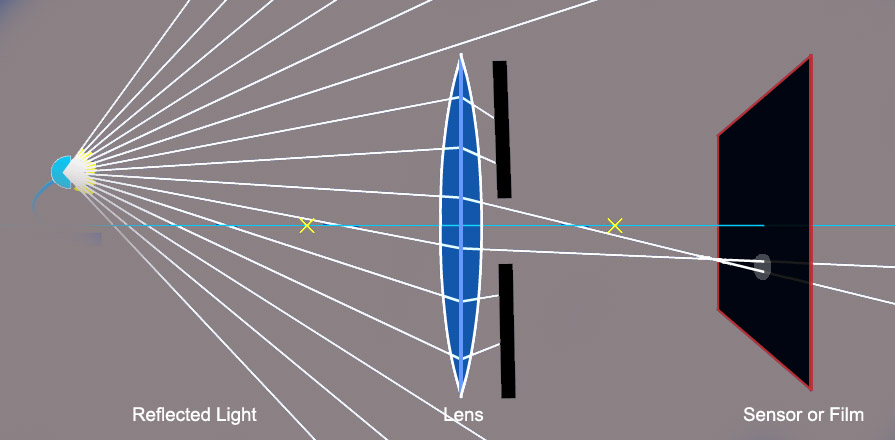
We will ignore the fact that the image passes through a point and is reversed on the sensor or film as it does not effect the explanation just complicates the diagram. as we are exploring a single point of light here not an image The iris reduces the diameter of the base of that cone, so there's less light, but a single part of the reflected light forming the cone still passes through the iris and is still focused by the lens to the same single point on the sensor (or retina)


Stacks Image 36

So we still have our single point of light the light hitting the sensor, we just have less of it as the aperture is stopping some of the cone as shown in the diagram. This is why using a smaller aperture (or a smaller hole or lens) requires longer exposure time, the sensor requires a longer amount of time to absorb the same amount of light.

So, if making the aperture smaller forces you to use longer exposure times, what's the point of having an aperture then you maybe asking. As we discussed earlier it is because it gives a greater depth of field and a sharper image across the sensor.

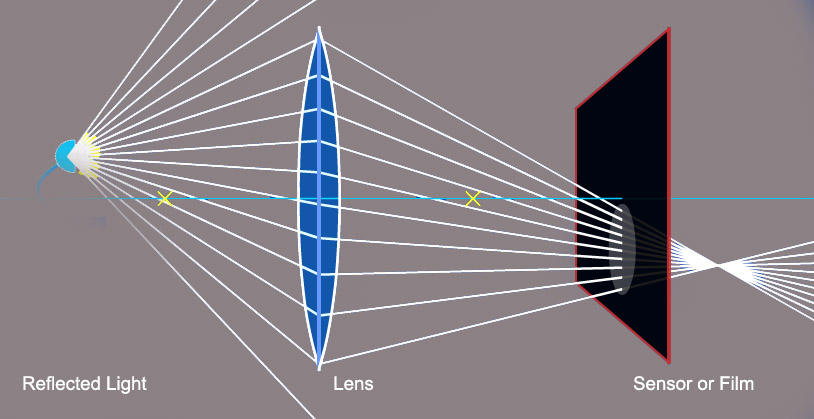
This is because if the sensor or film is too close to the actual focus point of the reflected light it creates an out of focus image point as shown below.


Stacks Image 40


And if it is too far away we still get an out of focus point.

Stacks Image 46


Before you think that you just need to focus the camera better, this is not possible for every instance of reflected light however good the lens optics as you have a cone of light not a single point are so there will always be part of the cone not in focus.


Notice that, in both cases, the light beams all come from a single points, but they will not all hit the image-sensor at a single point. Rather, they will be spread out in a circle. This is what causes out-of-focus points to appear blurred in a photo. This circle is sometimes called the Circle of Confusion. Incidentally, this also explains why out-of-focus points that are brighter than the surrounding points appear as circular discs or bubble bokeh.If you change the aperture to lets say a heart shape or a star the circles of confusion will be that shape. This is used to create creative effects by adding shapes to the front of the lens.

So, what happens when we put an aperture behind or in front of the lens as in these effects.

Stacks Image 48


So now less light hits the sensor, meaning we'll need a longer exposure. However, something else has happened, the circle of light (from our point) striking the sensor has become smaller. This will cause the point to appear more in-focus in the final image. Hence, a smaller aperture will increase the depth-range at which objects appear in focus, ie. it increases the depth of field by reducing the circle of confusion and increases the sharpness of the overall image. This also means that only the centre of the lens optics is being used and these were often the most accurate part of the lens, especially on vintage lenses.

Thus, the larger the aperture (or lens), the less exposure time you'll need (due to there being more light), but the shallower your depth-of-field will be (due to the light from out-of-focus points striking a larger area) and the more lens distortion (due to the less accurate lens optical performance on its outer edges). Inversely, the smaller your aperture (or lens), the larger your depth-of-field will be, the sharper the image but the more exposure time you'll need.

If we could get an infinitesimally-small aperture, we could get everything in focus in one shot... but we'd need an extremely long exposure time, or an extremely sensitive sensor. This is essentially how a pinhole camera works.

Adding more lens elements can help but will never remove this problem.

Of course if we place the aperture too close to the sensor so it stops light reaching part of it completely, we will get vignetting. Interestingly some cameras were designed with the aperture inside the camera body to simplify the lens design, but they then needs redesigned lenses. Indeed some cameras even had the shutter inside the lens not inside the camera and very old cameras needier such long exposure times that they just used the lens cap as a shutter!

There is one more thing to note. The cone of light entering the camera is more dispersed when the source of the reflected light is closer to the camera. Light from a long distance away is often called infinity. Infinity is light that is almost parallel so does not cause the same distortions.

See Light and Photography
HERE Aperture and Lens Size HERE and Digital Sensors HERE


Site Search


Stacks Image 69