Steve Cushing Impresionist Fine Art Photography

Steve Cushing Impresionist Fine Art Photography

Embracing imperfection, recording emotions, one impression at a time…

Lens Flare


Please read the section on how lenses work first. LINK here to this section.


Lens flare usually refers to the stray light from the subject and the lens. For many photographers an ideal lens would only transmit all the light from the subject to form a high-contrast image in the focal plane. In practice, a quantity of stray light also reaches the image or reflects off the lens to cause haze. You may be lucky in that this non image forming light may integrate to give a near uniform additional level of illumination at the image surface. But the overall effect is a loss of image contrast or reduced density range of a photographic image.

For optical instruments in general, stray light is called veiling glare, but this is not a good term since it implies uniformity of the illumination level when in fact it is ‘structured’ so that stray images, ghost images, bright spots and diaphragm ghosts may appear as well. The more general term glare is preferable, but for photographic systems the term flare is more often used, the two being largely interchangeable.

Types and sources of flare

Flare is primarily due to a number of conditions, including the nature of the subject and its surroundings, inter-reflections between surfaces of a lens, reflections and scattering from various mechanical surfaces adjacent to or within the camera and lens, plus artefacts such as dirt or fingermarks on optical surfaces.

Reducing flare

To reduce the variety of flare effects a number of positive measures are possible. The lens designer may arrange that the flare image pattern is reduced and out of the primary image area.

The use of single and multi-layer coatings is the most useful technique.

The rims of lens elements can be blackened. The iris diaphragm blades, the inside of the lens barrel, and any mechanical features within can be treated to be of low reflectance to reduce the aperture value effect on flare. It is found that matte black paint is poor for this purpose, having a small but significant specular reflection. Machined ridges or striations are better but best of all is electrostatically precipitated black flocculent material. Interior baffles also help and are vital in catadioptric lenses and long focus lenses.

Externally, lens hoods, shadow boards and va­rious shielding devices may be used to prevent sources outside the subject area inducing flare.


Stacks Image 5


Lens hoods

The lens hood, sunshade or matte box, to give it its various names, has the prime and vital function of shielding the lens from glare sources outside the FOV of the lens. By restricting the acceptance angle to only image-forming rays from the subject, most oblique rays from elsewhere may be blocked.

The interior of the hood must be treated to reduce the possibility of reflections entering the lens in this way. Black velvet, flock paper, fine raised ridging and corrugated b

Lens hoods come in many designs and shapes and may even be built into the lens, though in such cases they are seldom of adequate length. The cylindrical form is cheapest to make and allows the lens to rotate during focusing. An extension sleeve may be adjustable for different focal lengths. A square or rectangular hood can give more exact shielding to the FOV, being the shape of the format in use. Some hoods have rear cut-outs so as not to obscure a viewfinder image or to permit insertion of a series-mounted filter. Some are of rubber and so can be folded back over the lens when not in use.


Creating Lens Flare

Lens flare looks like a burst of light sometimes geometric and sometimes as lines of light, that appear in your photos near light sources and we have just discussed how to remove it. As we have seen lens flare is caused by the scattering of light and the reflection/refraction of light within the various glass elements of the lens. Flares manifest in two ways: visible artefacts of various shapes or a haze across the entire image. Modern lenses have multi-coated glass that remove almost every trace of lens flares they redesigned not to have lens flare although many cause a loss of contrast when the light source is in front of the camera which is why we use sunshades.

Many photographers believe that lens flare distracts from the main subject as if you have geometric spots all over your shot, you’re going to draw attention away from what matters, but for me, as a creative photographer I am interested in the whole composition and lens flare can be part of that composition. When used carefully, flare can offer a fantastic artistic result, and it can make for very creative photos.

Which is why it pays to learn not just how to remove it but how to produce and work with lens flare for maximum creative effect.

To achieve lens flare you need to:

  • Remove the hood or shade.
  • Point the lens at least somewhat toward the sun, if not directly into it.
  • Experiment with aperture as it’s the aperture that takes over, and determines how the lens flare looks. The wider the aperture, the softer the flare. The narrower the aperture, the more hard-edged and starry the flare will become.

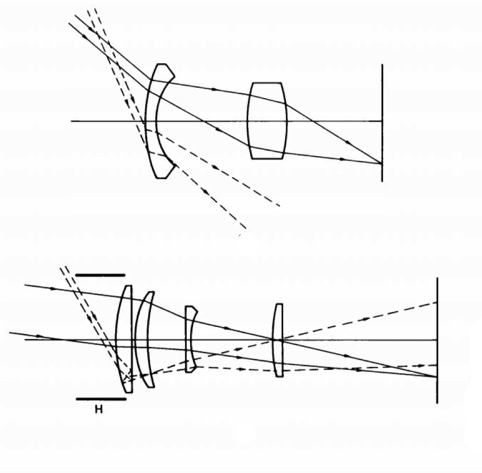
But one of the main factors is the choice lens and there are not many that achieve pleasing results as lenses have been designed to avoid the flare.

In my experience lenses with shorter focal lengths tend to be easier when trying to create artistic lens flare. Obviously lens coatings are not helpful, so older vintage lenses work best.

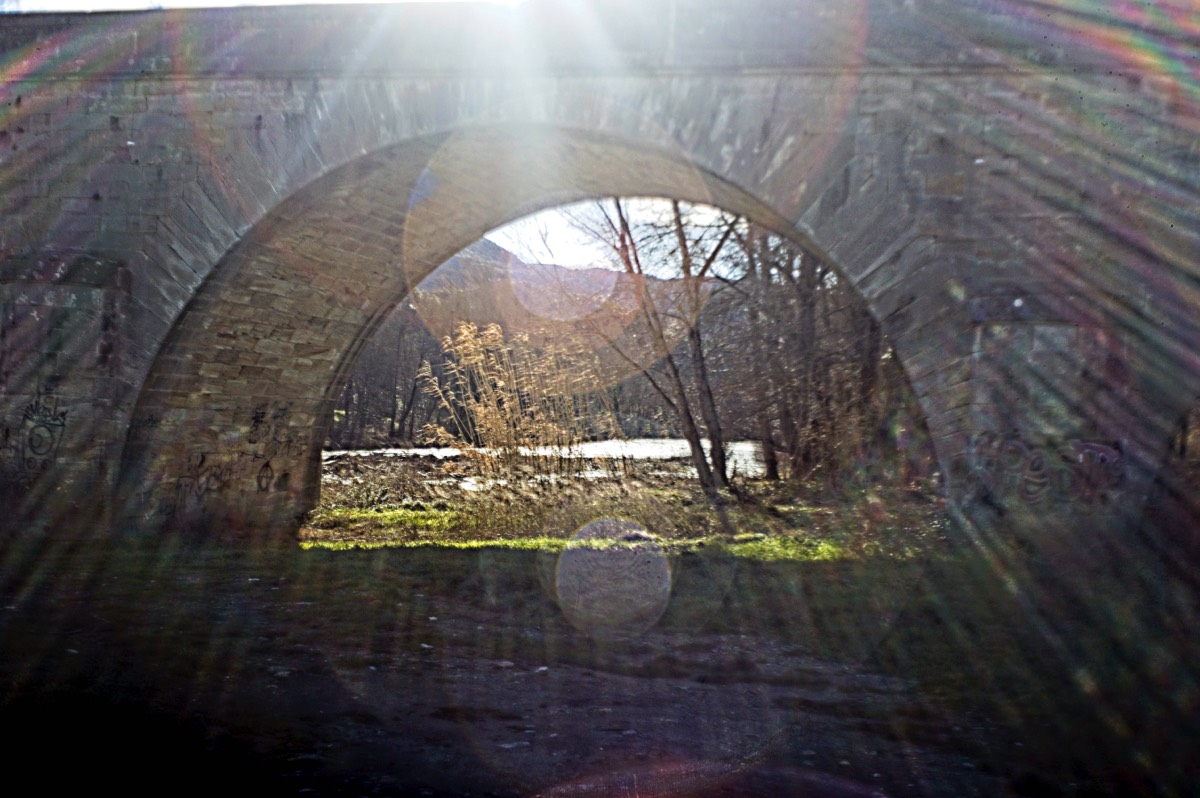
It is not Just the Lens

You can read much nonsense on the web about how this lens gives this type of flare and this lens another. I am reminded by a blogpost where someone had posted that folks needed to change the photographer not the lens! Whilst I would put it more subtly, many a truth is said in jest. The secret is to learn what to do.

If you can't fully control your camera and lens manually then do forget playing with lens flare. Even with the correct lens the right aperture, focus, ISO, distance to object and most important of all angle of the sun to the lens all play a part. Half a degree makes a big difference moving from stars, whiteout, bubbles and ovals to rays of light. You need to play with the settings well before trying to take a good image!

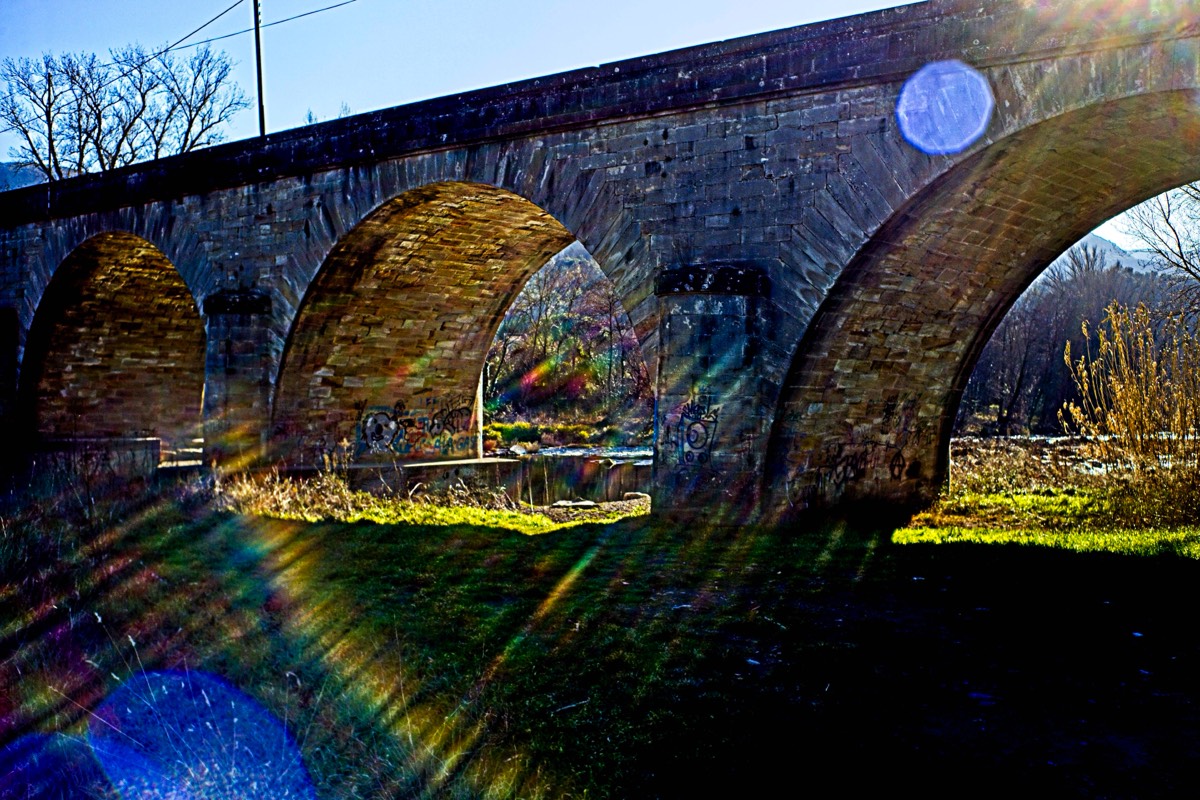
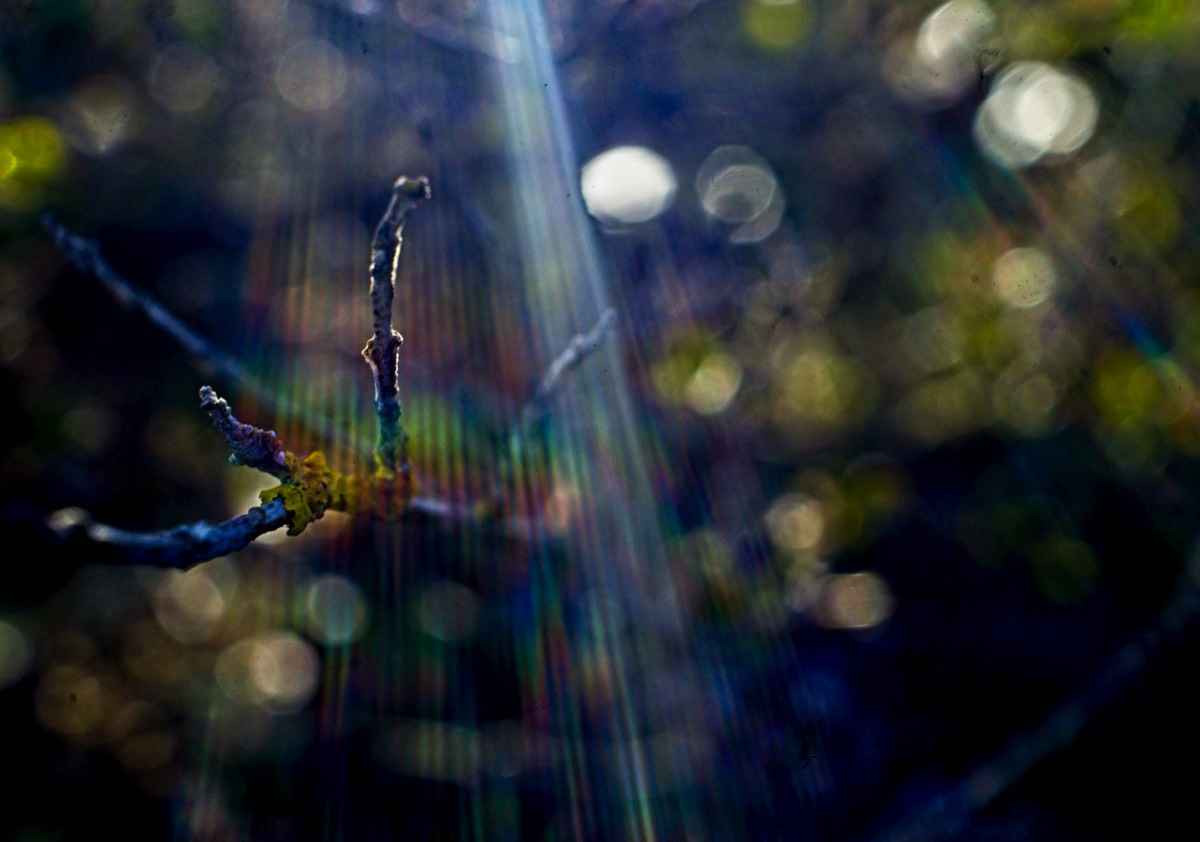
Taking images that you can move e.g. a flower, so that you can set up the best angle for the flare then position the flower is the easiest. Taking images of trees is hard as any shade will prevent the flare and taking images of things like a river is very hard as tou can't move the river closer to the sun so time of day, position of surrounding trees etc all play a part in preventing or helping the photographer. Many of the images on this site were taken whilst laying on the floor to get the correct angle!

Like all photography PATIENCE is a virtue.

Some folks add lens flare in the editing software but as someone who used the creative process when taking the image I can always tell if this has been done by the lighting on the subjects in the images and the size and type of flare. Enjoy the creative process when taking the image and then if you want to enhance by post processing techniques such as adding contrast at least the image with not just be a collage that anyone could achieve.

These images were taken with a Noflexar 35 f3.5. More images HERE


Stacks Image 28
Stacks Image 30


These images were taken with a MIR-1 37mm f2.8


Stacks Image 35
Stacks Image 37


Video on Lens Flare
Play
00:00
00:00
  • Off
  • Captions One


Site Search


Stacks Image 19

Steve Cushing Photography